How to Use MillenVPN Dedicated Servers with OpenConnect on ChromeOS
Verifying Connection Information for MillenVPN Dedicated Servers
Log in to My Pageand within the valid service "MillenVPN ○○○○ Connection InformationClick "".
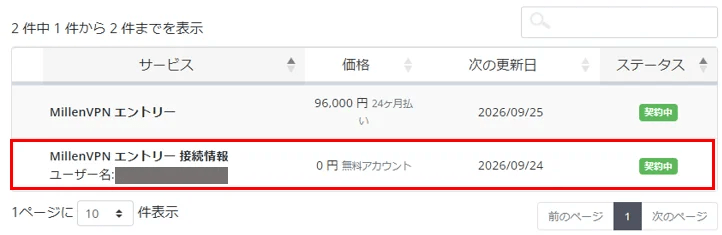
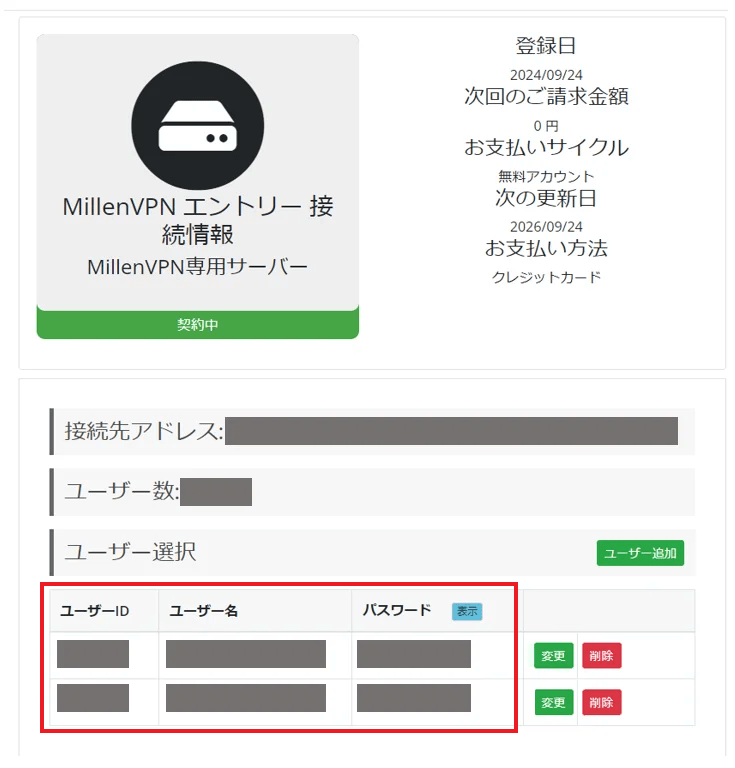
You can check the connected account and the destination address.
※Please note that the password differs from MillenVPN and MillenVPN Native.
How to Set Up ChromeOS
To use the MillenVPN dedicated server OpenConnect, you must install the app.
1. Search for "OpenConnect" in the Play Store and install it. You can also install it from the link below.
2. Launch the "OpenConnect" app.

3. Tap the "+" in the upper right corner.

4. On the profile addition screen, enter the information for the dedicated server and tap "OK".
▼How to Check the Server Address
1) Log in to My Page
https://accounts.millenvpn.jp/clientarea.php
2) Click on the service
3) MillenVPN ○○○○ Connection InformationClick
4) Within the page opened in 3)MillenVPN ○○○○ Connection Informationwill be displayed in the "Destination Address" field.
※ Please note that this differs from the connection server address for MillenVPN Native OpenConnect.

5. Tap "Profile name," enter a descriptive name (such as MillenVPN), and tap "OK."

6. Tap the "Back" button to return to the connection screen.
7. If the following screen appears, tap "ALWAYS CONNECT".

8. Enter your username and password.
▼How to Verify Your Username and Password
1) Log in to My Page
https://accounts.millenvpn.jp/clientarea.php
2) Click on the service
3) MillenVPN ○○○○ Connection InformationClick
4) On the page opened in 3), the "MillenVPN ○○○○ Connection Informationwill be displayed.
※ Please note that this is different from the MillenVPN app password.
※ The password for the MillenVPN dedicated server is,My PageYou can also change it from there.


9. After successful authentication, the screen will appear as shown below, indicating a successful connection.