How to Connect to MillenVPN Native Using Windows Settings Profiles
Verifying MillenVPN Native Connection Information
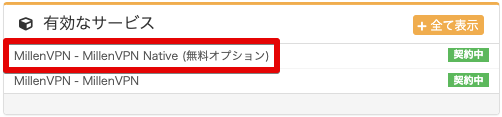
Log in to My PageThen, click "MillenVPN Native (Free Option)" within the active service.
Scroll down the screen to view your MillenVPN Native connection account and connection server.
For Windows, clicking the [Windows logo] of the server you want to connect to will download the configuration profile for Windows.

Connection Method Using Profiles
Downloaded profiles can be found in your browser's download history or in the Downloads folder in File Explorer.

When opening a file, if a security warning screen like the one below appears, click [Run].

The command processor will open and display the message "Allow this app to make changes to your device?" Click Yes.
After the command processor opens, wait a few seconds until the message "VPN connection setup complete." appears as shown in the image below.

Once you see the message "VPN connection setup is complete," open "VPN" within the "Network & Internet" settings on your PC.

When you open the VPN, the profile information you downloaded earlier will be added to the settings. Click [Advanced Options].

The following screen will open, so click [Edit].

The following settings screen will appear, so enter your MillenVPN Native username and password.
※ The password for MillenVPN Native differs from the information in the MillenVPN app.
▼How to Verify Your Password
1) Log in to My Page
https://accounts.millenvpn.jp/clientarea.php
2) Click on the service
3) Click MillenVPN Native (Free Option)
4) It will appear under "Your MillenVPN Native Connection Account" on the page opened in step 3.
※ The password for MillenVPN Native is,Change from My PageIt is also possible to receive it.

Return to the previous screen and click [Connect].

If it displays 【Connected】, the connection is complete.

How to Delete a VPN Configuration Using a Profile
When you no longer need a VPN configuration added from your profile, open the settings you wish to remove under "VPN" in your PC's Network & Internet settings, then click [Remove] to complete the deletion.
