Checking MillenVPN Native OpenConnect connection information
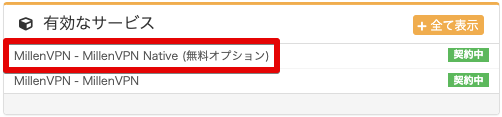
1. Log in to My Page and click on " MillenVPN Native (free option)" in the services you have activated.
2. You can find your MillenVPN Native OpenConnectconnection account information andconnection server address on the page.
*Please note that MillenVPN MillenVPNMillenVPN Native OpenConnect have different passwords.

How to set up Android
To use MillenVPN Native OpenConnect, you need to install the application.
1. search for "OpenConnect" in the Play Store and install it. You can also install from the link below.
If you cannot install "OpenConnect", please refer to the following page
How to use Cisco Secure Client on Android
Launch the "OpenConnect" application.

Tap the "+" button in the upper right corner.

On the Add Profile screen, enter the VPN server for OpenConnect and tap OK.
▼ How to check your connection server address
1) Log in to My Page
https://accounts.millenvpn.jp/clientarea.php
2) Click on Services
3) Click on MillenVPN Native (free option)
4) In the page opened in 3) MillenVPN Native OpenConnect will appear under "Connection Server Address".
Please note that this is different from the connection server address of MillenVPN Native.
*You must enter everything starting with "https://".

Tap "Profile name", enter an easy-to-understand name (e.g. MillenVPN), and tap "OK".

Tap the "Back" button to return to the connection screen.
7. WHEN THE FOLLOWING SCREEN APPEARS, TAP "ALWAYS CONNECT".

Enter the user name and password.
▼ How to check your username and password
1) Log in to My Page
https://accounts.millenvpn.jp/clientarea.php
2) Click on Services
3) Click on MillenVPN Native (free option)
4) In the page opened in 3), click on " Your MillenVPN Native Connection Account".
Please note that the MillenVPN Native OpenConnect password is different from the MillenVPN application password.
You can change your MillenVPN Native OpenConnect password from My Page.


9. After successful authentication, if the screen appears as shown below, the connection has been successfully established.