MillenVPN Native OpenConnectの接続情報の確認
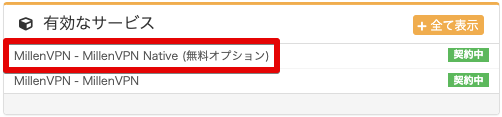
1.マイページにログインし、有効なサービス内の「MillenVPN Native (無料オプション)」をクリックします。
2.ページ内で、MillenVPN Native OpenConnectの接続アカウント情報と接続サーバーアドレスを確認できます。
※MillenVPNとMillenVPN Native OpenConnectはパスワードが異なりますのでご注意ください。

Windowsの設定方法
MillenVPN Native OpenConnectをご利用いただくためには、ソフトウェアのインストールが必要です。
この手順では、Windows 11、Windows 10においてMillenVPN Native OpenConnectの利用を開始することができます。
1. 下記リンクからクライアントをダウンロードします。
2. ダウンロードしたファイルをダブルクリックし、実行します。

3. 「この不明な発行元からのアプリがデバイスに変更を加えることを許可しますか?」という表示が出た場合は、「はい」をクリックします。
4. インストールが始まります。「次へ」をクリックします。

5. ライセンス契約書が表示されますので、「同意する」をクリックします。

6. Install Optionsが表示されますので、「Create openconnect-gui Desktop Icon」にチェックを入れ、「次へ」をクリックします。

7. インストール先の設定画面です。「次へ」をクリックします。

8. スタートメニューの設定画面です。「次へ」をクリックします。

9. コンポーネントの選択画面です。「インストール」をクリックします。

10. 「このデバイス ソフトウェアをインストールしますか?」という質問が表示されたら、「インストール」をクリックします。
11. インストールが完了しました。「完了」をクリックします。

12. OpenConnect GUIが起動します。歯車マークをクリックし、「New profile (advanced)」をクリックします。

13. New profile画面が表示されますので、下記の情報を入力し、「Save & Connect」をクリックします。
| Name | 好きな名前を入力(例:MillenVPN) |
| Gateway | 接続サーバーアドレスを入力 ▼接続サーバーアドレスの確認方法 1) マイページにログイン https://accounts.millenvpn.jp/clientarea.php 2) サービスをクリック 3) MillenVPN Native(無料オプション)をクリック 4) 3) で開いたページ内のMillenVPN Native OpenConnectの「接続サーバーアドレス」に表示されます。 ※ MillenVPN Nativeの接続サーバーアドレスとは異なりますのでご注意ください。 ※「https://」から始まる全てを入力する必要があります。 |
| Username | ユーザー名を入力 ▼ユーザー名の確認方法 1) マイページにログイン https://accounts.millenvpn.jp/clientarea.php 2) サービスをクリック 3) MillenVPN Native(無料オプション)をクリック 4) 3) で開いたページ内の「お客様の MillenVPN Native 接続アカウント」に表示されます。 |
| Batch mode | チェックON |

13. 「Connect」をクリックし、MillenVPN Native OpenConnectに接続します。

14. 初回接続時は許可画面が表示されます。「Accurate information」をクリックします。

15. パスワードを入力します。マイページで確認した「接続用パスワード」を入力します。
▼パスワードの確認方法
1) マイページにログイン
https://accounts.millenvpn.jp/clientarea.php
2) サービスをクリック
3) MillenVPN Native(無料オプション)をクリック
4) 3) で開いたページ内の「お客様の MillenVPN Native 接続アカウント」に表示されます。
※ MillenVPNアプリのパスワードとは異なりますのでご注意ください。
※ MillenVPN Native OpenConnectのパスワードは、マイページから変更いただくことも可能です。

17. 接続が完了しました。

16. 次回からは、「OpenConnect-GUI」を起動し、「Connect」をクリックすればMillenVPN Native OpenConnectに接続できます。

トラブルシューティング
Windows10 32bit版など一部環境にてOpenConnect-GUI v1.5.3(安定版)で動作しない場合があり、その場合は下記リンク先のOpenConnect-GUI v1.6.2の利用をお試しください。